How to Hang a Dartboard, Plus Regulation Dartboard Height and Distance
Everything you need to know about dartboard height, darts distance, mounting instructions, and more.
Dartboard Height
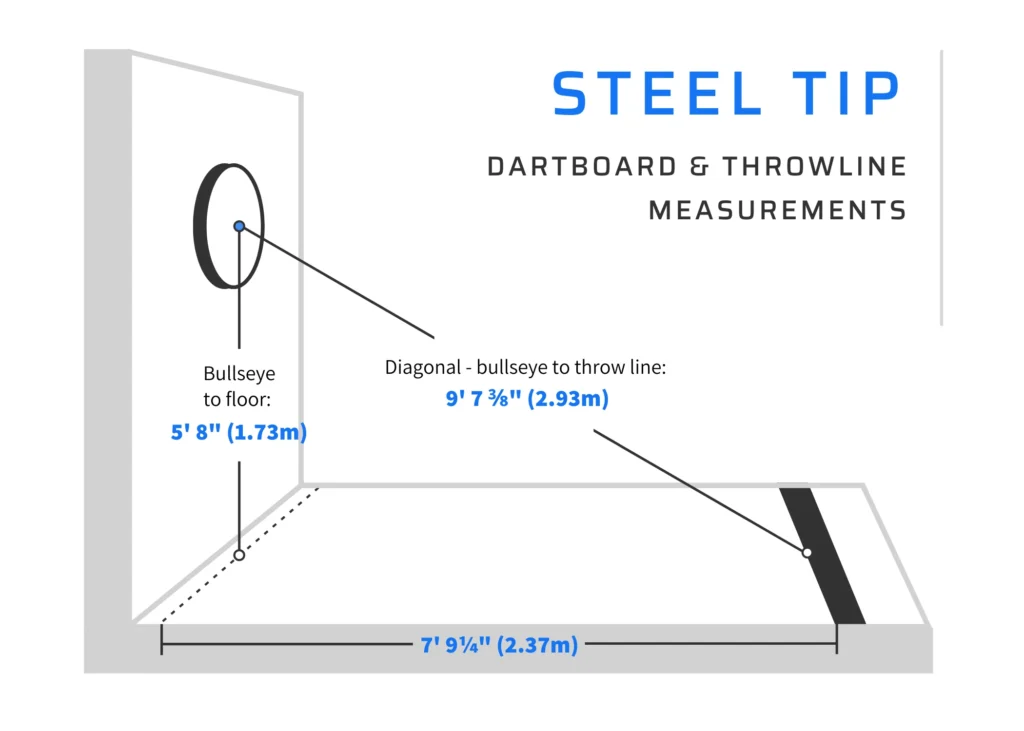
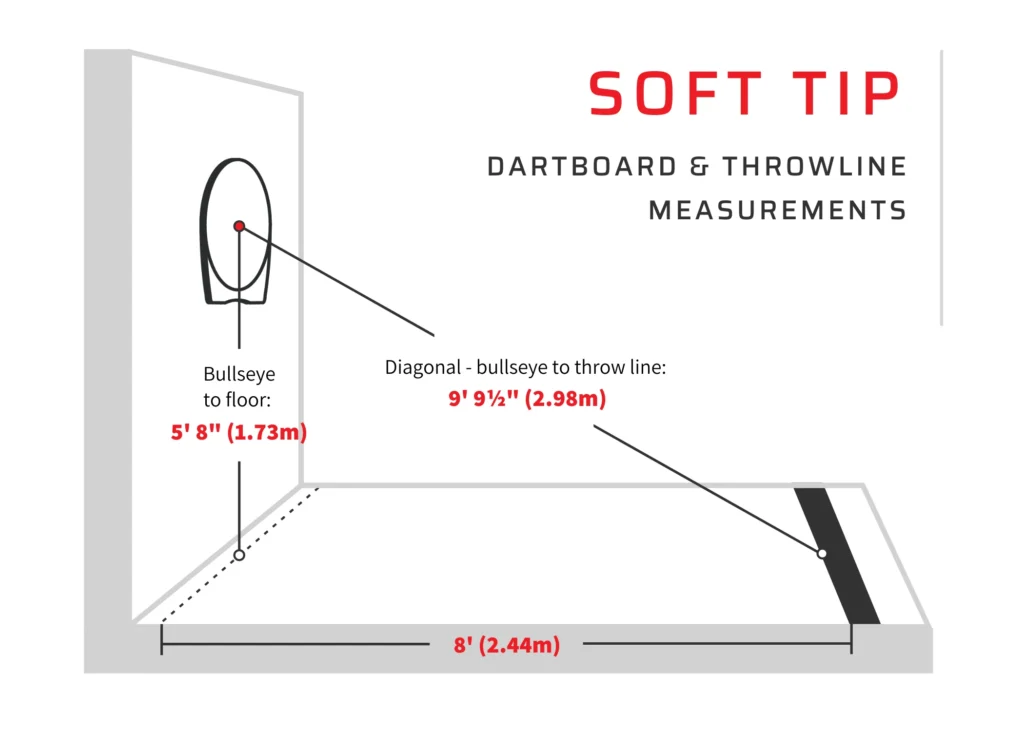
Regulation dartboard height from the floor to the center of the bullseye is 5 feet 8 inches (1.73 meters). This measurement is recognized internationally and remains the same for both electronic and steel tip dartboards.
We recommend measuring and mounting the dartboard first before measuring throw line distance.
Dartboard Distance for Throw Line – Horizontal
Horizontal distance from the face of the dartboard to the front of the throwline differs between steel tip and soft tip dartboards.
Steel tip dartboards: Horizontal distance is 7 feet 9 ¼ inches (2.37 meters).
Soft tip dartboards: Horizontal distance is 8 feet (2.44 meters).
It’s important to measure from the face of the dartboard, not from the wall. You can measure the depth of your dartboard and then add that measurement on to the horizontal distance from the wall. You can also drop a string from the face of the dartboard to the floor and measure from that point. Either way, you will achieve the same result.
Dartboard Distance for Throw Line – Diagonal
Another way to determine throw line distance is to measure diagonally. Distance differs between type of dartboard.
Steel tip dartboards: Diagonal distance is 9 feet 7 ⅜ inches (2.93 meters).
Soft tip dartboards: Diagonal distance is 9 feet 9 ½ inches (2.98 meters).
For this one, you’ll want someone to hold a tape measure at the bullseye so you can measure diagonally to the front of where the throw line should be. For an easier way to measure, or if you don’t have someone to lend a hand, you can use a Pro Line measuring tape, which allows you to use a dart to hold the measuring tape in place.
How to Mount a Dartboard with a U-Shaped Bracket
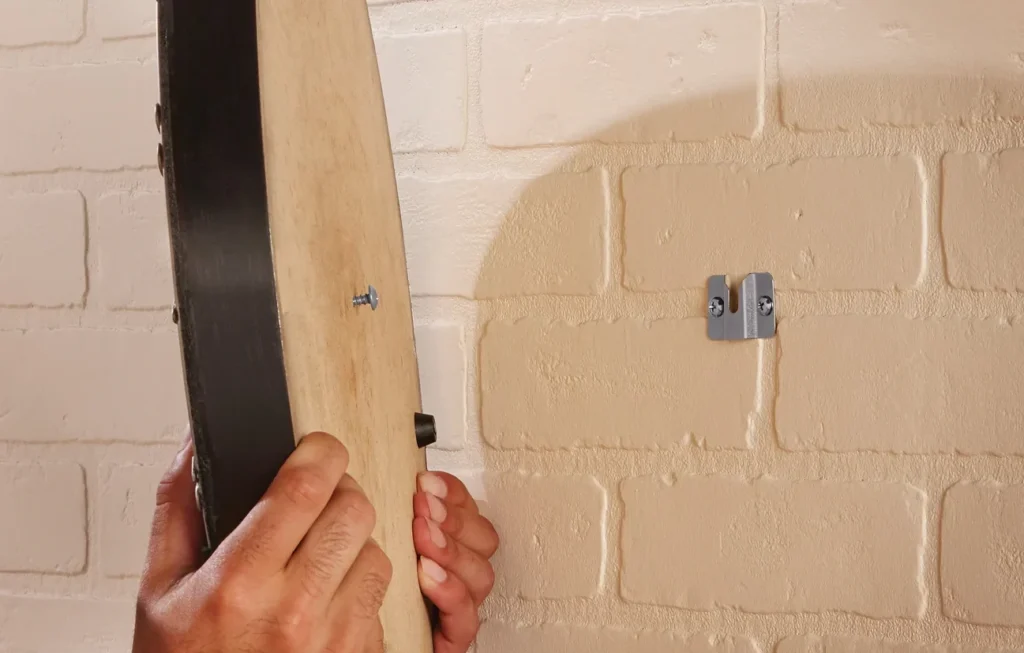
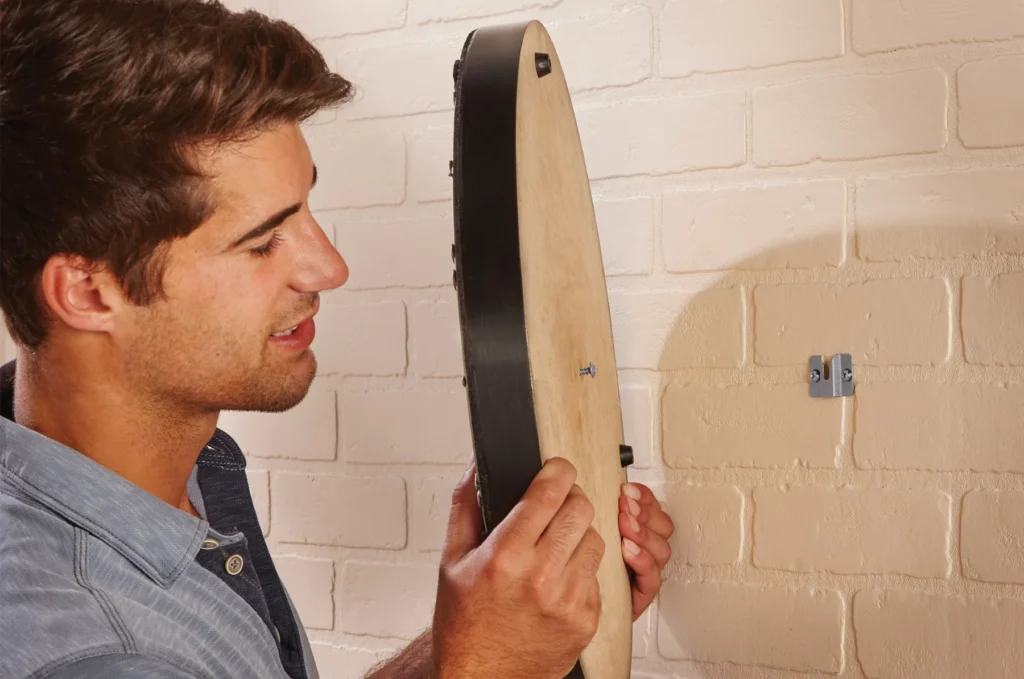
These are instructions for a U-Shaped Mounting Hanger Kit. You can apply these instructions to any sisal dartboard with a u-shaped metal bracket. U-shaped brackets come standard with most sisal dartboards.
We recommend mounting your dartboard directly into a stud for maximum support. If you’re mounting your dartboard in drywall, use heavy duty anchors to support the weight of the board.
Before you start, make sure you have all the tools necessary. You will need a drill or screwdriver, a pencil, and a tape measure. Now let’s get started!
Step-by-Step Instructions
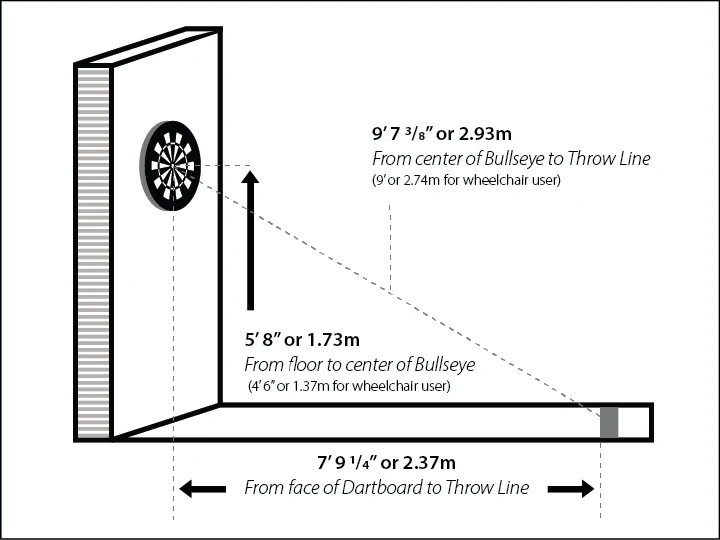
Begin by marking off the proper height from the floor on your wall (5’8” or 1.73m). The bottom of the u-shaped channel should be at this height.
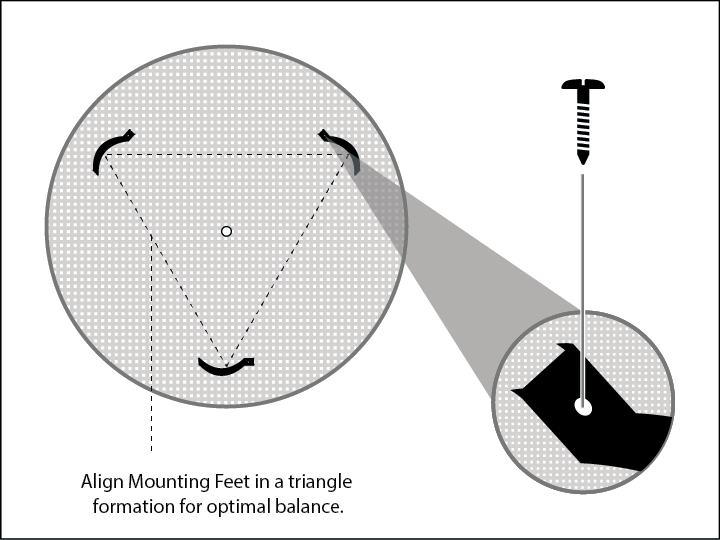
Apply the metal Mounting Feet to the back of your dartboard, using the Stabilizer Screws. If your dartboard came with round plastic Spacers instead, use a hammer to nail each one into the back of your dartboard. Make sure they’re spaced evenly, making a triangular shape.
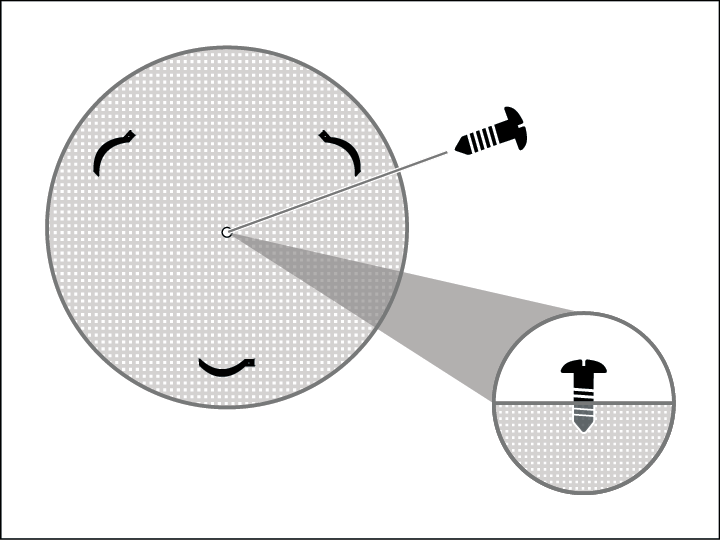
Drive the Dartboard Center Screw into the pre-drilled hole, leaving space to hang the dartboard onto the Mounting Bracket. See our additional tips below for proper screw depth.
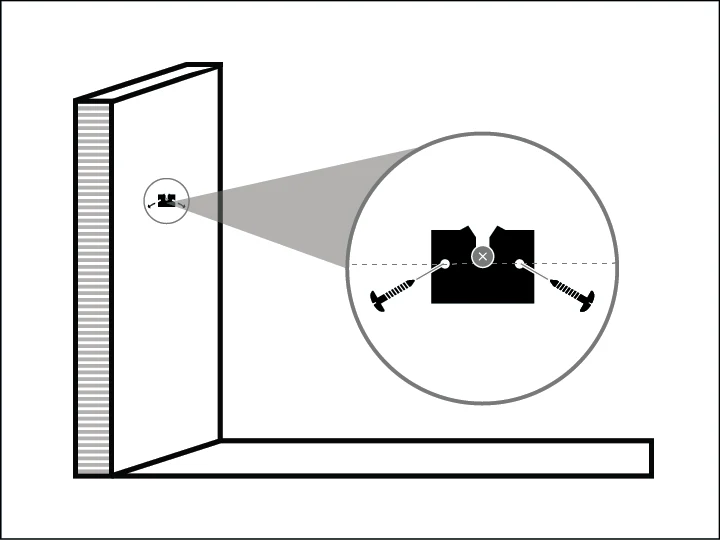
Use the two Bracket Mounting Screws to install the Mounting Bracket to your wall, using wall anchors if not positioned over a stud.
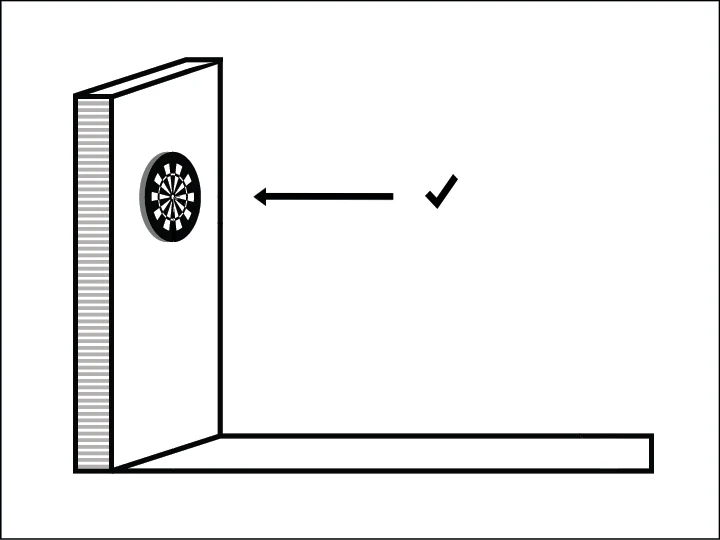
Place the dartboard onto the Mounting Bracket and check for tightness against the wall. If the dartboard is wobbling, remove and tighten or loosen the Dartboard Mounting Screw as needed.
Additional Dartboard Hanging Tips
Getting the dartboard’s center screw height adjusted to the proper depth can be a little tricky. Below is a depth guide illustration to help you understand how much of the screw should be left sticking out of the back of the dartboard.
If the screw is tightened too far into the dartboard (first illustration), there won’t be enough left of it to hook onto the bracket. If the screw isn’t screwed into the board enough (second illustration), it will hook onto the bracket but will be off balance and wobbly. It might take a few tries to lower or raise the center screw until the dartboard no longer wobbles.

How to Mount a Dartboard with a QuickFit Bracket
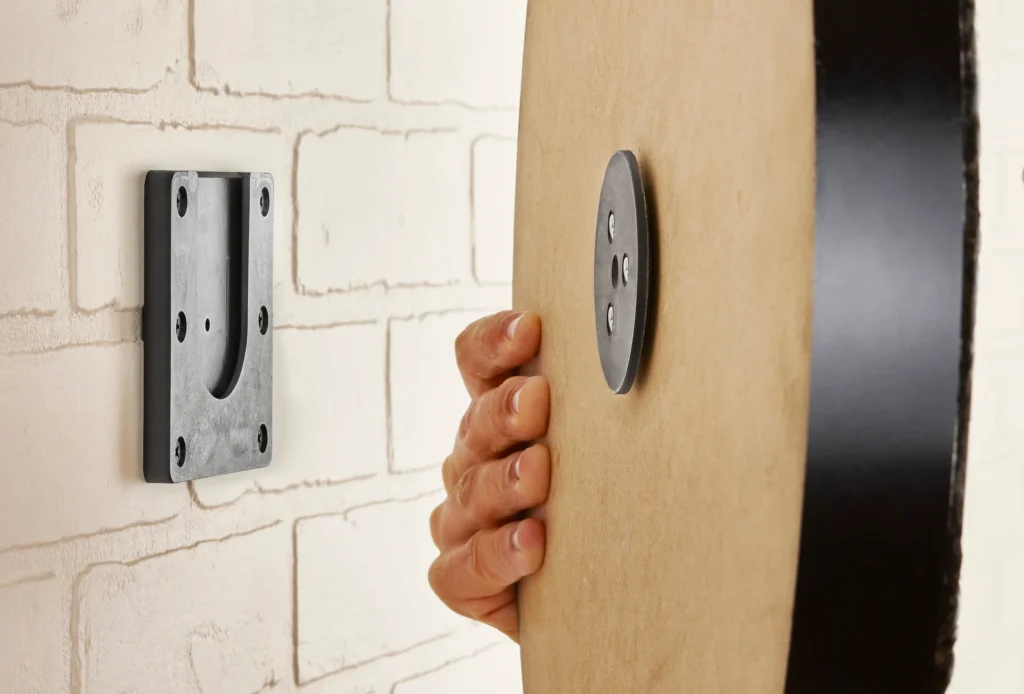
The QuickFit dartboard mounting bracket provides a relatively new method of mounting your dartboard. It uses a track slider system to eliminate guesswork and wobble. Essentially, this mounting method makes the process quicker and easier. You don’t have to worry about getting just the right screw height or messing with any mounting feet.
Step-By-Step Instructions
Getting the dartboard’s center screw height adjusted to the proper depth can be a little tricky. Below is a depth guide illustration to help you understand how much of the screw should be left sticking out of the back of the dartboard.
If the screw is tightened too far into the dartboard (first illustration), there won’t be enough left of it to hook onto the bracket. If the screw isn’t screwed into the board enough (second illustration), it will hook onto the bracket but will be off balance and wobbly. It might take a few tries to lower or raise the center screw until the dartboard no longer wobbles.
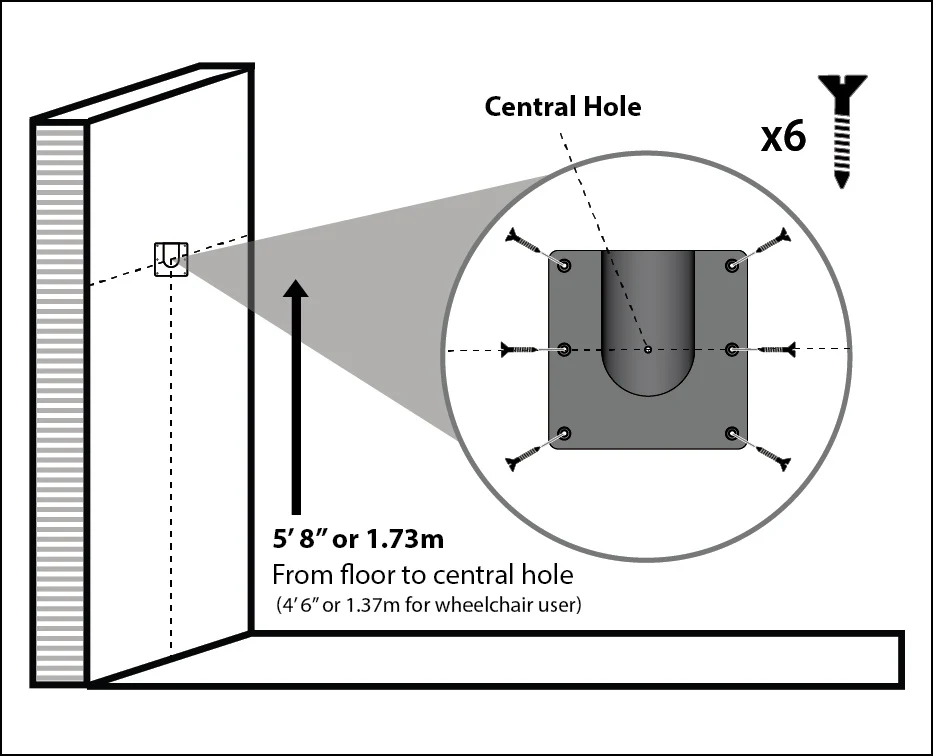
On the wall, mark a spot 5′ 8″ from the floor and align the central hole of the bracket with the mark. Drive the six mounting screws into the corresponding holes. Use the six wall anchors if not over a stud.
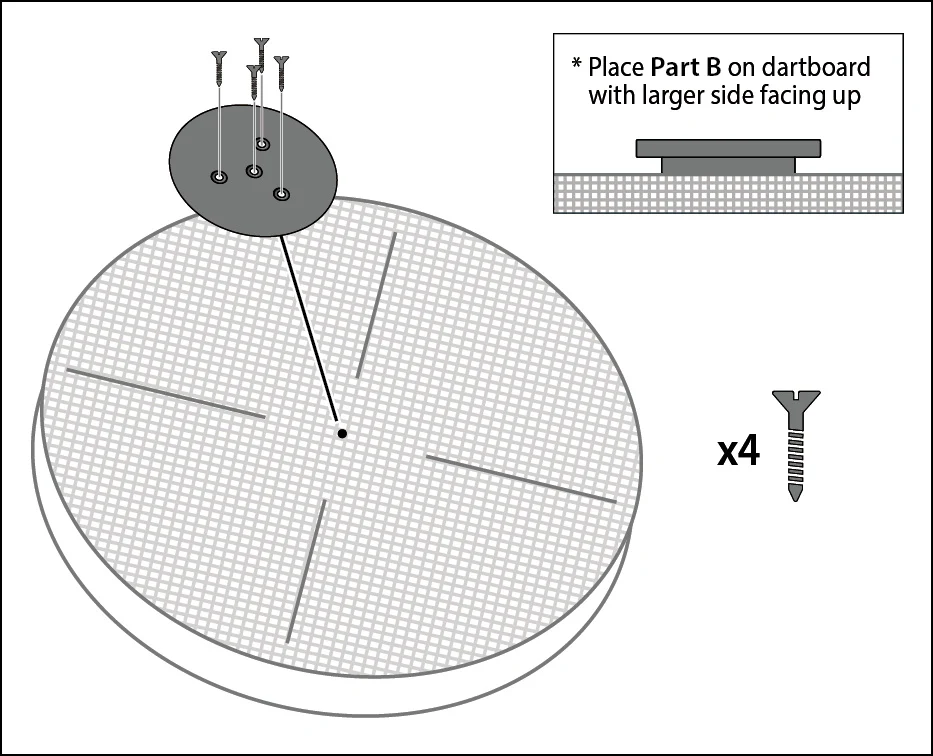
Apply the mounting disc directly in the center on the backside of your dartboard. Drive the four stabilizer screws into the proper holes.
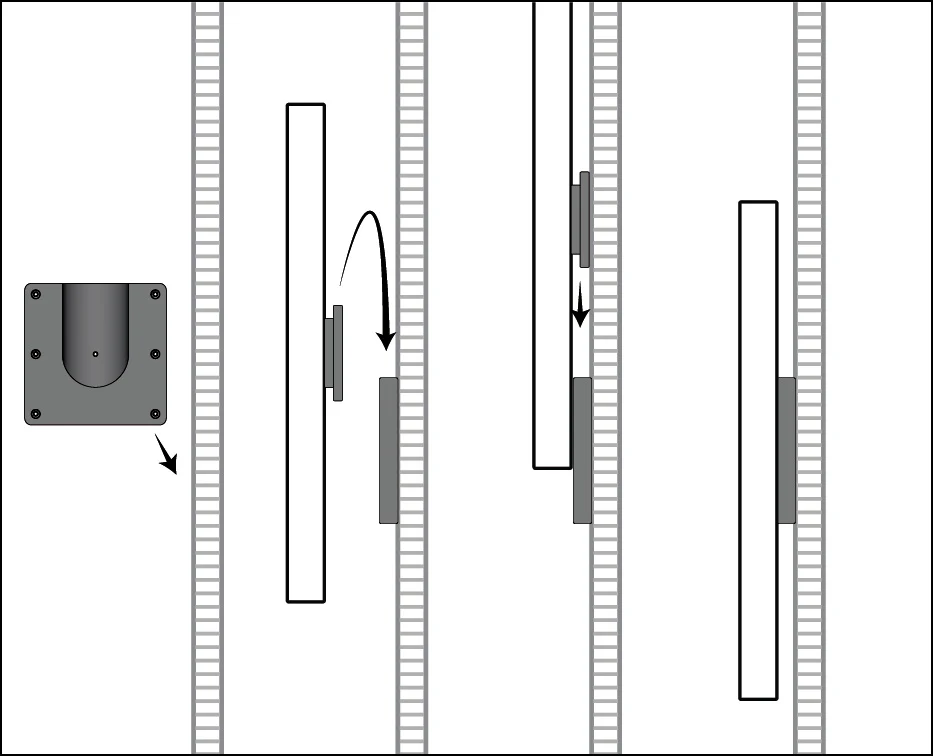
After the bracket and disc have been installed, slide the dartboard with the disc onto the bracket on the wall.

Use a Pro Line Oche Tape included with the QuickFit to mark off the correct distance from your wall to your throw line.
